Assign Ad To A Campaign
Updated 2 Oct 2020 11:06:31
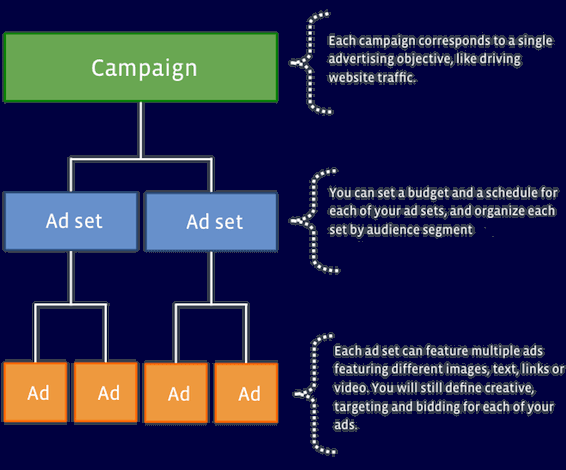
An advertising campaign is a series of advertisement Ads that share common properties, conditions (often referred to as Ad set) under which they can be served in an advertising network. Advertising campaigns are built to accomplish a particular objective or a set of objectives using Ads assigned to them.
After you have COMPLETED your Ad (see How to create Ads), you can now use the Ad for your campaigns. Only completed Ad can be used for campaigns to be run on AdVow Ad Network.
Assigning your Ad to a specific campaign is the third and last step of Creating an Ad.
- If you have selected the option to assign the Ad to a Campaign Now immediately after creating the Ad, then you will be taken straight to the Campaigns page
- If you have selected the option to assign the Ad to a Campaign Later, then from left sidebar menu, click My Ads, select the necessary Ad, and then click the Edit button.
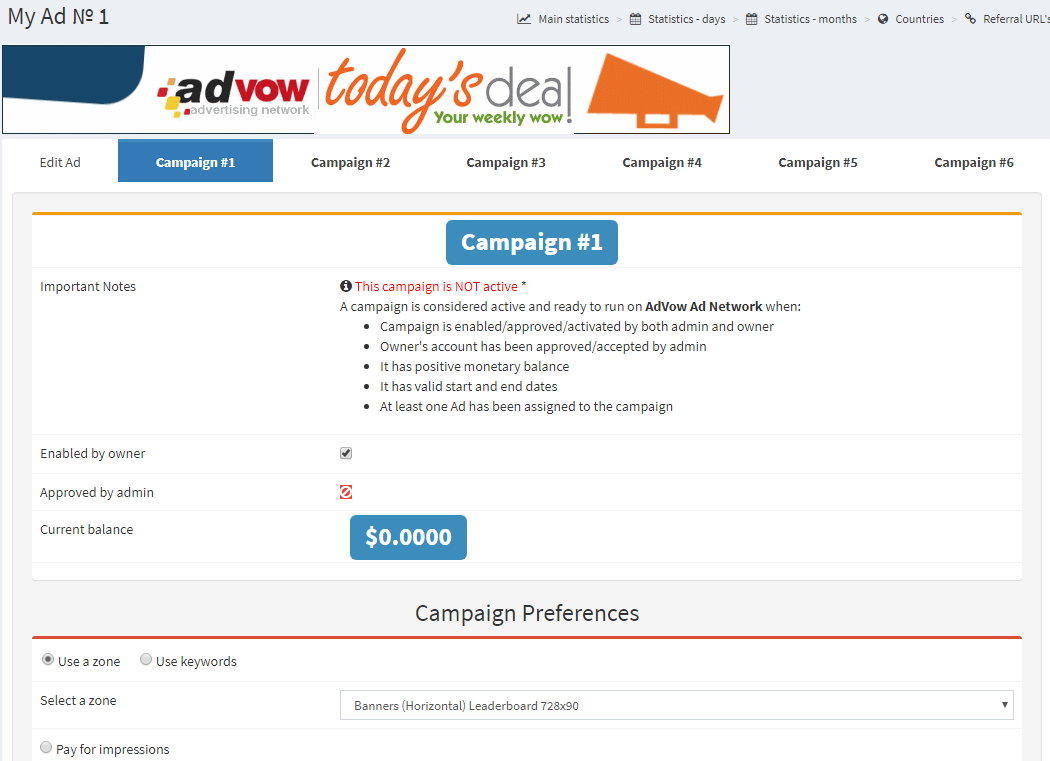
- From the campaign tabs, you will be presented with 6 Campaigns. Select the necessary campaign tab for the Ad.
- Edit the campaign properties
- Done, Save the changes
Campaign 1
Campaign 2
Campaign 3
- You can assign multiple Ads to a Campaign
- You can assign same Ad to multiple Campaigns
Brief explanations of properties (or Adset) of a typical campaign are given below. For convenience, the properties have been grouped into four sub-sections:
General, Campaign Preferences, Time and Device Targeting, Funding
General |
|
Important Notes |
Indicates the status of the campaign and brief explanation of conditions, under which a campaign can be considered completed and ready to run on AdVow Ad Network |
Approved by admin |
Campaigns are by default not approved by the system Administrator. They need to go through moderation and be approved by the administrator before they can go live. This is necessary in order to ensure that campaigns comply with the guiding rules, meet specified standards and TOS. For example, hate campaigns are not allowed. Approval is normally within 24 hours. After approval, the red sign will turn green. |
Current balance |
Amount left from the initial sum of money, budgeted for the campaign. |
Campaign Preferences |
|
Use a zone |
An advertisement zone is a location on websites that has been designated for serving advertiser Ads.
At AdVow we have developed a simple, yet effective naming concept for Ad zones. We name Ad zones such that they are easily recognized. Intuitively. You can observe any of the following naming patterns.
This concept allows website owners to modify how advertisements are served on their website without having to change any code. Advertisement zones are pre-defined by the system, with corresponding Ad codes generated for publishers to copy and insert into the pages of their websites. |
Use keywords |
You may opt to use keywords, for which your Ad(s) in the campaign should be displayed.
You indicate the keywords to Match relevant site content.
The implications (downside) are that:
When you select the option to "Use keywords", you will be presented with additional form, in which you must provide answers to specific questions. Namely:
Notes: |
Time and Device Targeting |
|
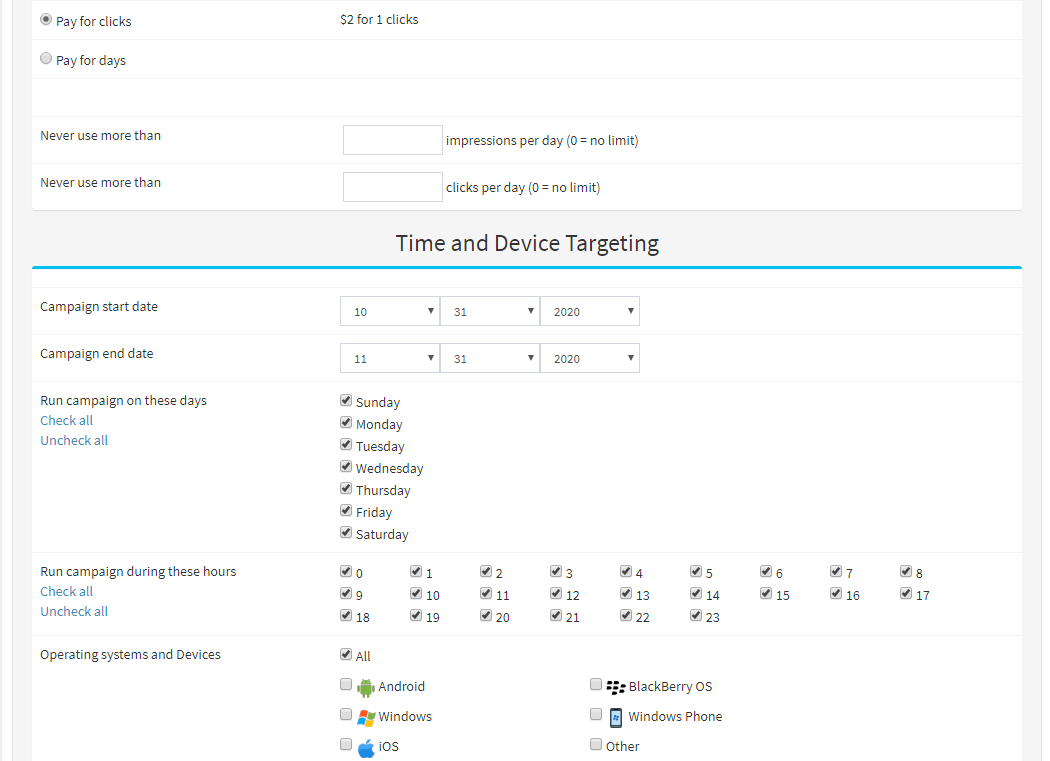
Campaign start date |
This is the date (MM-DD-YYYY) you want your campaign to start running on the network. The start date must NOT be less than the current date. Also bear in mind that most campaigns go through moderation by the Admin and approval may be granted within 12 hrs. after submission. So make provision for this. To be on the safer side, it is recommended that you add additional 1 day to the actual date you plan your campaign to take off. |
Campaign end date |
This is the date (MM-DD-YYYY) you want your campaign to end running on the network. The end date must be greater than the start date by at least 1 day. Also bear in mind that most campaigns go through moderation by the Admin and approval may be granted within 12 hrs. after submission. So make provision for this. To be on the safer side, it is recommended that you add additional 1 day to the actual date you plan your campaign to take end. |
Run campaign on these days |
You have the option to indicate which days of the week you want your campaign to run on the network. Your Ad(s) will be displayed only on the selected days of the week. By default - All (7) days of the week. |
Run campaign during these hours |
You can further target your campaign according the hours of the day. Your Ad(s) will be displayed only within the selected hours of the day. By default - All (24) hours of the day. |
Operating systems and Devices |
Device Targeting
Option can be included to indicate on what type devices the Ad(s), under the campaign, be served. Our libraries will detect if the user is on a mobile device (excluding tablets) or desktop computer, and show the appropriate Ad(s). Notes: Be sure you upload an IAB compliant Ad size for devices you have selected. If you are not sure, select All devices. |
Funding |
|
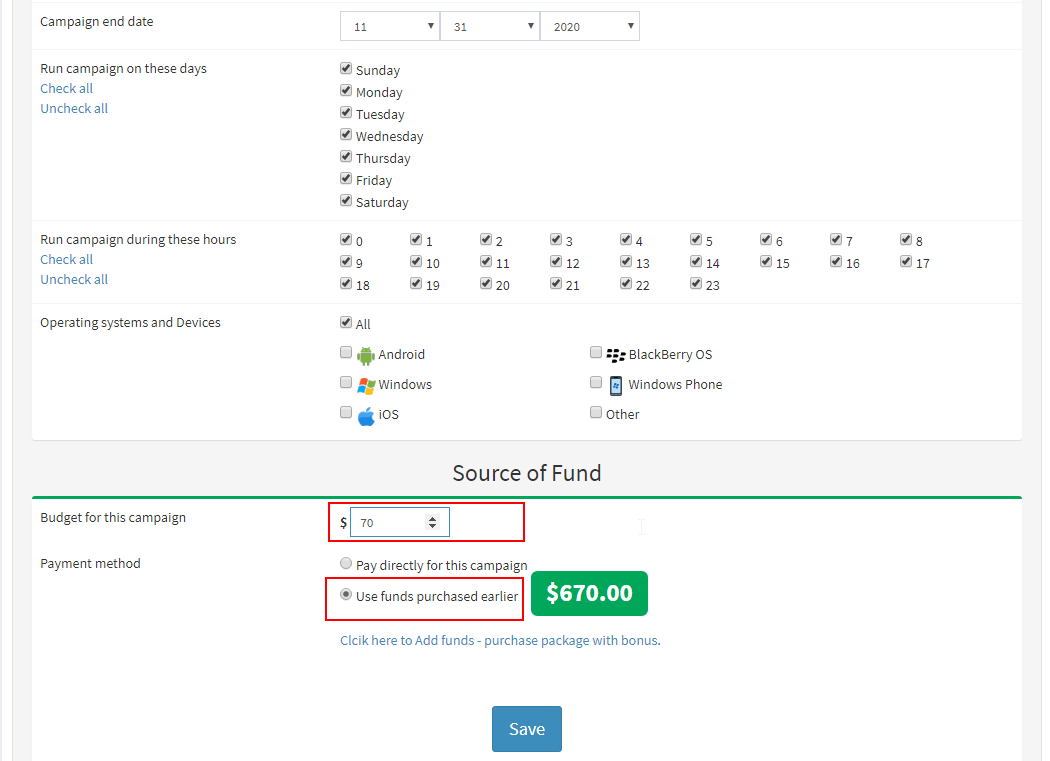
Budget for this campaign |
Indicate your maximum budget for the campaign |
Payment method |
Select how you want to pay for the campaign. Here you have two options:
Use funds purchased earlier - a more flexible option to be selected if you have enough funds in your account to offset cost of the campaign. As you run the campaign, funds will be deducted from this source, gradually. You can also separately add funds to your account with this method by purchasing necessary package with bonus - link provided along with this option - before finally submitting the campaign. |
Click the button to finalize
Special notes on paying for campaigns
1. Before submitting a campaign, you will need to specify a budget to fund the running of the campaign.2. In the form, indicate the approximate amount of money you are ready to spend on the campaign.
3. You can pay for a campaign cost directly or instruct the system to deduct fund from your account balance.
4. If you opt to pay for a campaign directly then, upon submission, you will be taken to the Order page, from where you can proceed to checkout and then make necessary payment.
What Next?
- To Edit/Delete the Ad: from left sidebar menu, click to open My Ads, select the necessary Ad, and then click the Edit/Delete button.
- To Edit/Delete the Campaign: from left sidebar menu, open My Campaigns item, select the necessary campaign, and then click the Edit/Delete button.
- To create a new Ad: from left sidebar menu, click New Ad, complete the form. Submit and follow the instructions on the screen.


